Saturday, August 15, 2015

The Idea

So I am building a 2 Player Bartop Arcade system and I thought it would be a good idea to write a blog about how I am going to do the build process. For anyone else out there who is interested. Also please ignore the dates in these posts It's so I can keep the build going from top to bottom in Blogger.


I have been wanting to build one for quite sometime now but I was not too sure what gaming system I could run in one. Then I stumbled upon this Raspberry Pi device that is loaded with tons of old school video games. I found this person on Facebook selling them all pre loaded and good to go with 2 SNES style USB controllers. It's called a Micro Cade and it comes with 15,000 games, HDMI Cable, Power Cord, 2 X SNES style USB controllers and instructions on how to use it. I have played quite a few games and there is no lag on the new tv's I have even tested it on a 70" LCD screen with surround sound and it works perfect! Check out the Facebook page on how to buy one click the below picture.


Once my Micro Cade arrived that's when I started looking on ebay for USB arcade sticks/buttons that could possibly work with this device. So I ended up purchasing the below sticks/buttons from china there is tons on ebay so check them out. I went for the black design as pictured below.

Friday, August 14, 2015

Wiring the Arcade Stick & Buttons

My Arcade stick and buttons arrived 2 or so weeks later from China I unpacked the box and started to work out how to wire these up. The below picture of the USB converter was really the only instructions they had for it all.


Wiring up the buttons was quite easy however the joystick was trial and error. Below is a picture of the wiring that managed to work on the Joystick.


I wired up the rest of the buttons I needed and plugged everything into the USB Converter.


I decided it would be a good idea to choose what buttons were what so it was not as confusing. Next Plug your USB cable from the converter into your Micro Cade box and fire it up!

Thursday, August 13, 2015

Mapping the buttons and stick.

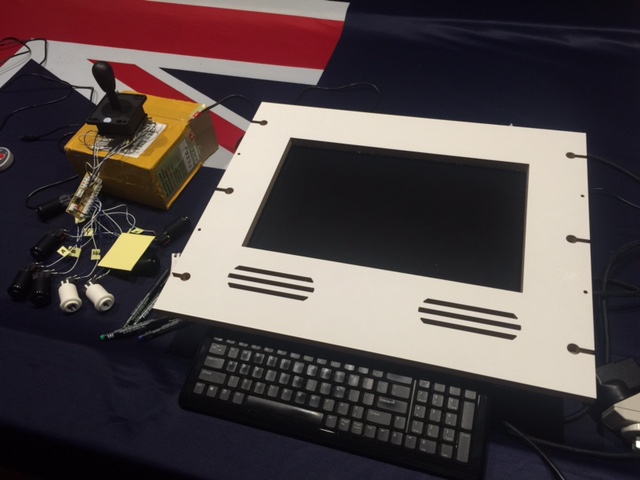
Plug in your Joystick/Buttons and in another USB slot I plugged in a USB Keyboard and also one of the SNES style controllers to help with the setup.

Click Start on the SNES Controller and then click on Configure Input. The next screen you can set up some controls by simply holding a button down then it will step you through the set up.


Most of the controls are now set up, however! if you select a game to play with your Joystick/Buttons it will not let you insert a coin (Hold Select) or even click the start button to play. It will also not let you exit the game either by holding Select and Start. So we need to set this up next, this step can be a little tricky as we have to use the console and the keyboard. I found a video on you tube that really helped so I will just post the link of the you tube video here. You will need to watch from 9min to 13min. Everyone's button config setup will be different but I will post a screen shot of mine from the retroarch.cfg file. Just a heads up the retroarch.cfg file is for ATARI, NES, SNES, Gameboy, Gameboy Colour, & Sega controls.

Gameboy Advanced, C64, MAME and Final Burn Alpha are configured differently.

retroarch.cfg setup controls

It's a good idea to write down what buttons are linked to what numbers so my select is number 4 and my start is number 5 etc. because you can use these same numbers later on. Here is my setup for for retroarch.cfg file.
sudo nano /opt/retropie/configs/all/retroarch.cfg


Now that you have followed that video You should have a basic understanding of how to use the console and access files, So the next hit F4 on the keyboard and type.

sudo nano /opt/retropie/emulators/pifba/fba2x.cfg
You should know what numbers are for your buttons so just go through and set them up and then Ctrl + X to save and exit.

Below is a picture of my buttons setup again for Final Burn Alpha.


Next we can go ahead and set up the controls for the MAME section. this is a bit different. First I powered down the Micro Cade and just had the SNES and Keyboard plugged in. Boot up a random game from the MAME section and once you are in hold the select button down and click the L button on the SNES controller. This should bring up a in game menu in MAME. Like the picture below. There is also a video that I recommend you watch on you tube that explains this set up. I would watch from 4:30min.

Mame setup controls


Select Input General, and then you can configure these controls. I found it easier navigating the UI using my keyboard. So I mapped my keyboard in.

Below is a screen shot from my setup.


Next you need to set up Select and Start with your buttons so you can insert a coin and start games. My Select is button 4 and my start is button 5. So scroll down in that menu and enter them in here. With what ever your numbers are for your buttons remember they will be different to mine.


Now you will need to set up the buttons so you can exit a game from mame. this is done in the UI Cancel part. I mapped my select (button 4) and start (button 5) to quit the game just like the SNES Style Controls. Below is a picture of that. Just Ignore the ESC and UP Button that was an accident, the Mame Input settings are touchy.


Now that is all done your Joystick and Buttons should be working nice, Here is a video of my buttons in action on Street Figher II on the SNES. I have also now ordered another Joystick and Button set as these are working good. They should be here in 2 weeks or so. I have not worked out how to configure the Gameboy Advanced or C64 yet. I might look at doing this later.

Testing my Arcade Buttons

Wednesday, August 12, 2015

The Cabinet Design

I ordered the cabinet from ArcadeWorx here in Perth! it's only a 20min drive away so I figured I would save on freight. I have heard good things about these guys, I was sent these renders of the design.


It's looking good I can't wait for it to be ready!

Tuesday, August 11, 2015

The Cabinet!

So I picked up the Cabinet today from Troy at ArcadeWorx, I have just had a good look at the pieces it looks very good and the screen fits very nice.


I am still waiting for my 2nd set of stick & buttons to arrive, so the next step is to get some clear gloss perspex for the screen area and also the stick & button board to protect the paint and stop it from getting scratched up. I will more then likely get something for the Marquee down the track too I am just not sure what I want to do for that yet.

Monday, August 10, 2015

Quick Update!

I am almost there! I am still waiting on my other set of buttons and stick, They should arrive this week sometime. The screen cutout and the control panel should be ready to pick up any day now from the perspex shop. I had to order another length of the black edging as I ran out. I have not taken a photo of it yet. But I wrapped one of the side panels in the edging and it really does give it a good finish I am really impressed with it. Hopefully everything arrives and is ready this week then maybe I can finish the build this weekend!


Saturday, August 8, 2015

Setting up Player 2

I don't have any pictures of it yet but setting up Player 2 is fairly easy. I just made sure on the Player 2 USB convertor I plugged everything in to the exact same place as the Player 1 USB convertor. then I went back through the sudo nano /opt/retropie/configs/all/retroarch.cfg & the sudo nano /opt/retropie/emulators/pifba/fba2x.cfg and copied everything player 1 had for the button and stick setup and created the same thing but just change it from player1 to player 2.

You need to make sure that you uncomment input_player1_joypad_index = 0 and then the other one input_player2_joypad_index = 1.

My Mame section is not working 100% right now I need to look into that more when I figure it out I will post my Mame config section up too.